Why is it Important to Correctly Prepare the Graphics?
If the graphic elements can be supplied in way that makes it easier for an animators to use straightaway, then it can save whole days worth of animation time. An animator’s time can be wasted by having to wade through unfamiliar/unorganised Illustrator files, converting file formats, picking through thousands upon thousands of unlabelled layers, and generally having to re-build graphics from scratch.
None of this stuff is complicated, but when there is a lot of it, then it can accumulatively add up to quite a lot of lost time. Therefore, If you’re a graphic designer, and if you’re able follow these simple concepts and rules, then you shall become an After-Effects-er’s new best friend, forevermore!
Files
Colour Mode
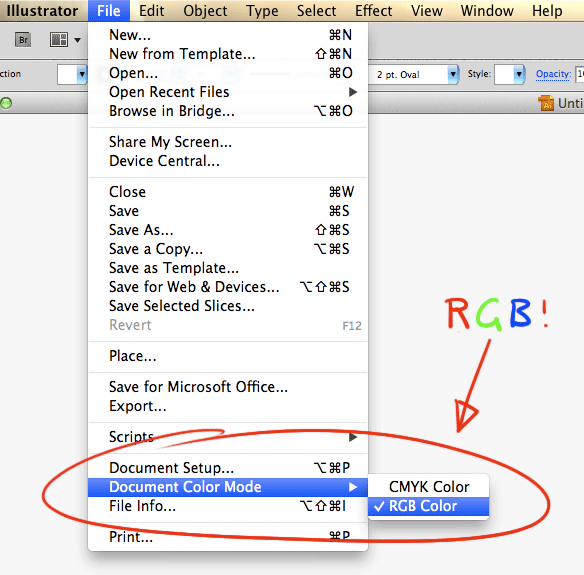
Files should be in RGB colour mode, and not CMYK.
CMYK is for fancy-pants print work, and is not suitable for animating with!
File Format
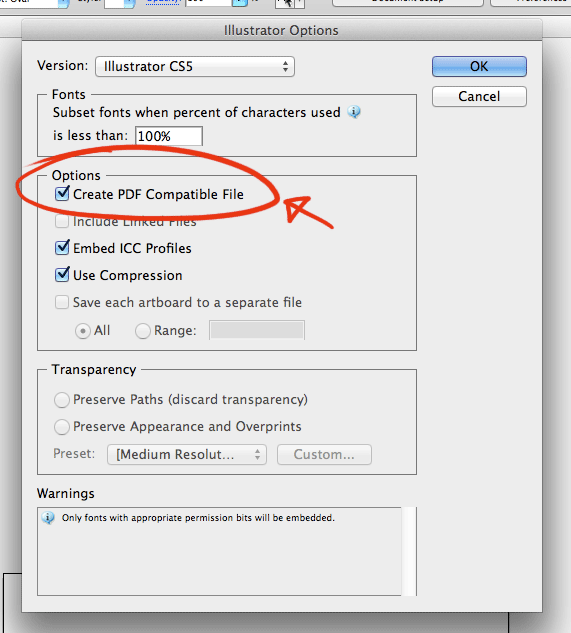
Files should be saved in Illustrator’s own .ai format, with PDF compatibility turned on.
Don’t put everything into one huge mega file!
Split everything sensibly into separate, smaller, more manageable files. This is for the following reasons;
- It makes it easier for an animator to find the necessary elements, and work with them.
- If necessary, It’s much easier to make small edits to the graphics later on in the project, without totally wrecking the animation.
- If a file becomes corrupt, then at least it’s only that one graphic element that gets fried, and not all the elements in the whole project. It does happen! Think of, “eggs”, “baskets”, and “putting in”.
File Organisation!
Files should named and organised according to their purpose, eg; “user_interface_elements.ai”, or “map_timbuktu.ai”. They should be placed in the relevant folder, eg; “…/shot_xxx/elements/…”.

Linked Files
The links will break when Illustrator files are swapped between Macs and PCs. Try to embed them, or even better, don’t use them at all! Or at least, not for graphics intended for import into After Effects. A much better option is to provide the associated files separately, and then they can be imported and composited directly in After Effects.

Multiple Artboards
Multiple artboards are excellent for storyboarding, and trying out different ideas, but from an After Effects point of view, they can be a bit of a nightmare to work with. It’s much better to put things into separate, well organised files, as opposed to just handing everything over in one huge impenetrably tangled mass of stuff (also, see above, “Don’t put everything into one huge mega file!”).
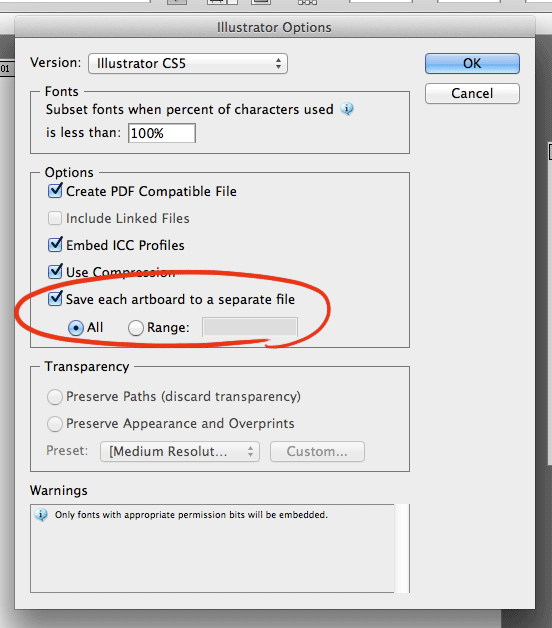
You can use the “Save each artboard to a separate file” option in the Save dialogue to help quickly split up your artboards into separate files.
Don’t fiddle with Illustrator files that are already being used in After Effects!
Unless you really know what you’re doing. Minimal colour alterations, if done VERY carefully, can be ok. The slightest dimensional change, however, (eg; position, scale, rotation, anchor, etc) can destroy weeks of delicate After Effects work. Don’t do it! Unless you want to make the After Effects person cry.
Layers
There are some differences in the way layers work, between After Effects and Illustrator.
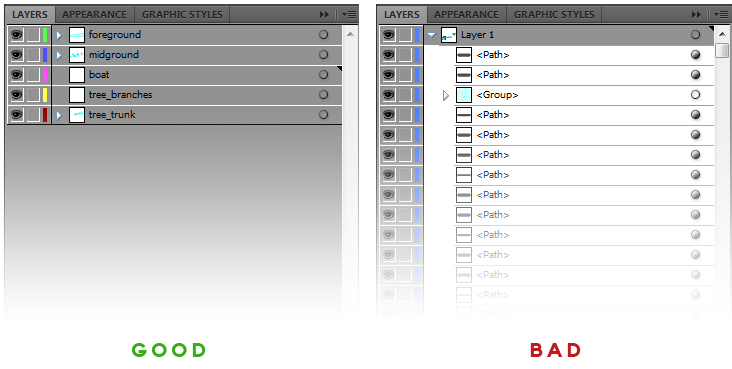
The most obvious difference, is that After Effects will only see the top-level layers of an imported Illustrator file. After Effects won’t see the nested layers in the composition timeline; These will all be flattened into a single layer.

Consequently, anything that needs to be animated as a seperate elements, must to be in a suitably named top-level layer of it’s own. It should not be nested away somewhere.
Layers need to be sensibly named and well organised
This can help prevent many wasted hours of poking around to find the right elements.
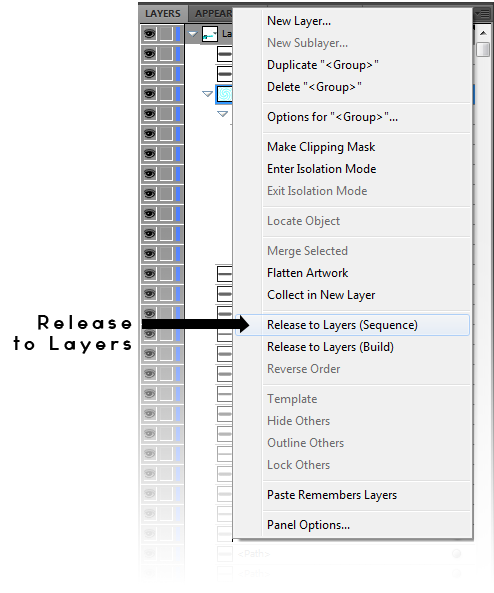
Release to Layers
You can use the “Release to Layers” command to quickly arrange a large amount of nested elements into their own layers.
Layer Effects
Remove all layer effects, eg; drop shadows, blurs, glows etc. These work better when created and manipulated directly within After Effects.
Delete Unnecessary/Obsolete/Empty Layers
Thanks!
Clipped bitmaps
These seem to confuse After Effects, and generally cause lots of grief. A much better, cleaner, option is to provide the necessary bitmaps as separate files, which can then be masked and composited directly in After Effects.
This can also be an issue if you’re intending to use bitmaps to add a bit of texture to graphics. In these cases it’s usually better to use Photoshop to create the elements, rather than Illustrator.
Anything bitmappy and textured should really be going through the Photoshop route anyway.
Maps and Diagrams
When designing maps and backgrounds, it’s always really useful to provide more material than just that shown within the camera frame. Remember, in animation, everything moves! Therefore, the wider parameters we can have to work within, the better.
- Don’t put important annotations too close to the frame edge.
- If we need to pan and zoom the camera, provide enough extra material for us to move around in without revealing the edges
Icons and Logos
Logos needs to be in vector format, or hi-res bitmaps with alpha channels. They also need to be in RGB format, not CMYK.
Text
If at all possible, text should really be approved and signed off, before any real animation work can start on it. The amount of text can be a critical influence on timings. A viewer needs to have enough time to read any onscreen text, and consequently this will effect animation and editing decisions. For this reason, text can be a difficult thing to change afterwards.
Also, try to spell things correctly before handing over to animators.
Fonts
Make them available please! I prefer OpenType/TrueType fonts, because they are compatible with both Macs and PCs. Mac-only fonts are not very useful for those of us on PCs.
Size of Graphics
Don’t make them too small! If necessary, It is possible to vectorise and scale up graphics inside After Effects, but this does accumulatively add to processing time, and it can sometimes cause glitchy, flickery problems with masks, effects, and render ordering.
We need bear in mind the size and shape of the intended media, and work to that. For example, a HD TV screen is 1920 x 1080 pixels. Graphic elements need to be scaled and proportioned to accommodate this. It can often be helpful to make graphics slightly larger than necessary.
Where possible, try to keep everything consistently proportioned.
Paths
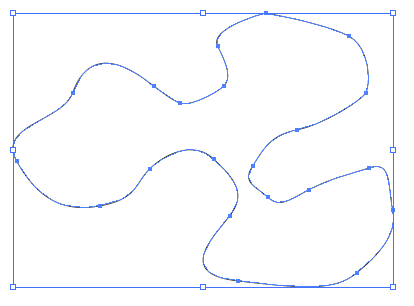
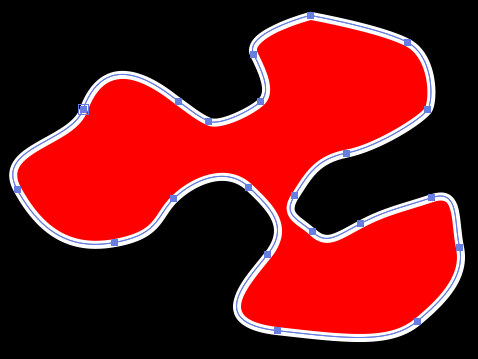
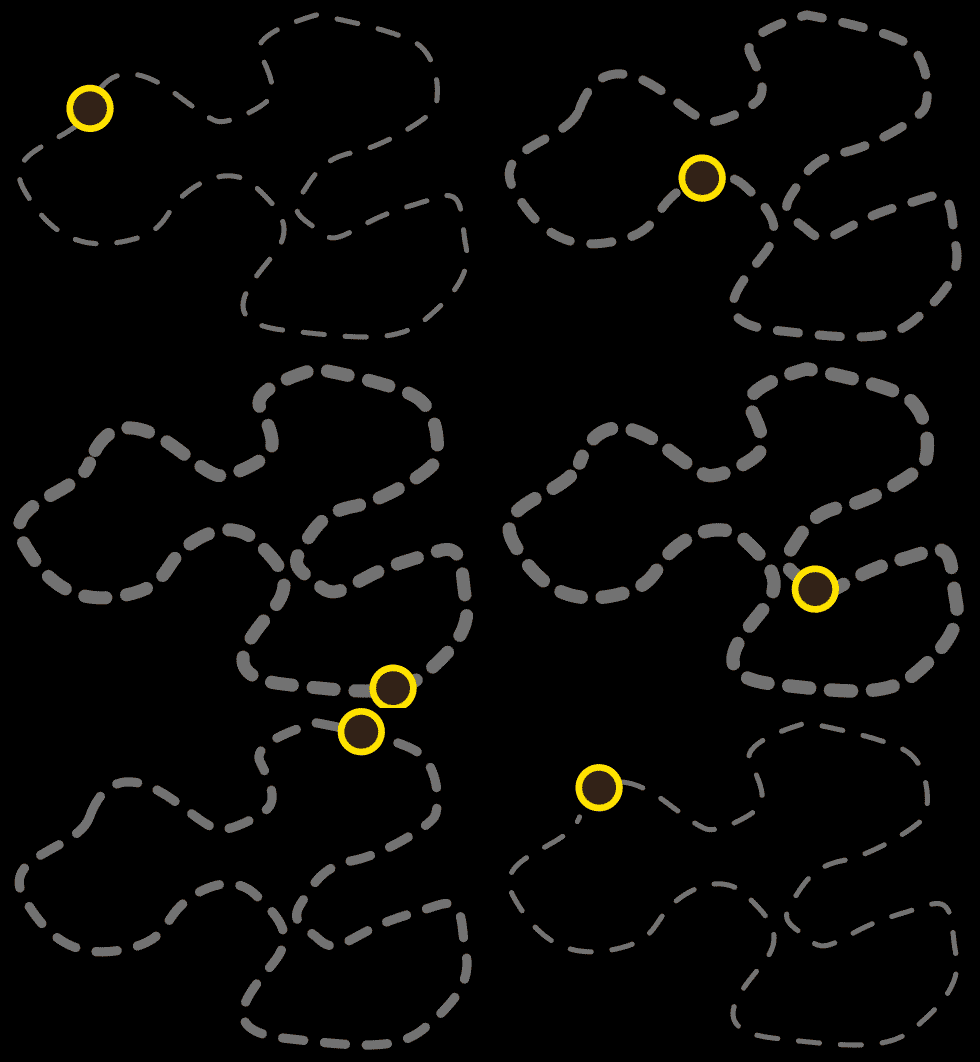
Sometimes we will want to copy and paste paths directly from Illustrator, into After Effects. This is particularly useful for the following reasons;
- This will allow us more flexibility in animating the graphics, using shape layers
- We can use the path as a “tram-line”, for moving things along.
- We can animate the line strokes “drawing” on.
- We can control stroke width directly within After Effects (useful for zooming into maps, etc), as well as many other animatable parameters.

Safe Frames
Safe frames are an annoying legacy from analogue television, and unfortunately, they still haven’t quite faded away into history yet. TV broadcast companies can be religiously strict about them.
So we do need to be, at least aware of safe frames, especially for any media that might potentially be shown on a television set.
Safe frames are, of course, less relevant for media intended for web, computers, mobile, and bespoke devices.
Conclusion
I hope this post is useful. Any comments, good or bad, will be muchly appreciated. Is there anything I may have missed?
Never, never, never… did I say never… take this post down. This will be so helpful in the dialog with design agency’s. Thanx!
This is brilliant. You are a good human being. Thank you!
Thanks! Easily understandable useful information!!
Awesome post mon ami. Merci!
I found this very informative and easy to understand. Thanks.
The only thing I think should also be mentioned (even if it’s not important because others like me will wonder) is the pros/cons/purpose of ticking the “Use Compression” check box in the save options of illustrator.
If you want the highest possible quality of graphics in your after effects comp (before preRendering a comp/scene or exporting to final format), is it better to NOT use compression or does not make much of a difference?
How can I get my anchor points to show up in the center? When I import my .Ai files into AE the anchor points change.
I noticed that leaving a few extra empty layers properly labeled can limit the mess ! It leaves extra room in case i need to add new elements or separate some elements in the illustrator file.
Otherwise I would have had to create a brand new illustrator file for the same scene and start a big mess.
wow so hopeful, thanks
Very good post, very informative, saving me… lots to work with here. I had a logo with many parts now I have to make each part it’s own top layer. WISTIA video said that the command Release to Layers Sequence would do it but it doesn’t. It does like you said imports only 1 top layer. Thanks I will try to make the multiple layers. Great Post! A+++
This is really useful information from both a graphic design and a beginner animator’s perspective. Thank you! *bookmarked* 😉
Well I was trying to export each artboard separatly, but when I import 1 artboard to AE, it includes all layers of all artboards and they are invisible… Does anyone know why?